How Can You Install a Corner Window Curtain Track?
When it comes to enhancing the aesthetics and functionality of corner windows, a well-chosen curtain track system can make a significant difference. Installing a corner window curtain track might seem daunting at first, but with the right tools and a bit of know-how, it’s a task I’ve found quite manageable and rewarding. Here’s a step-by-step guide on how to do it effectively.
Understanding Corner Window Curtain Tracks
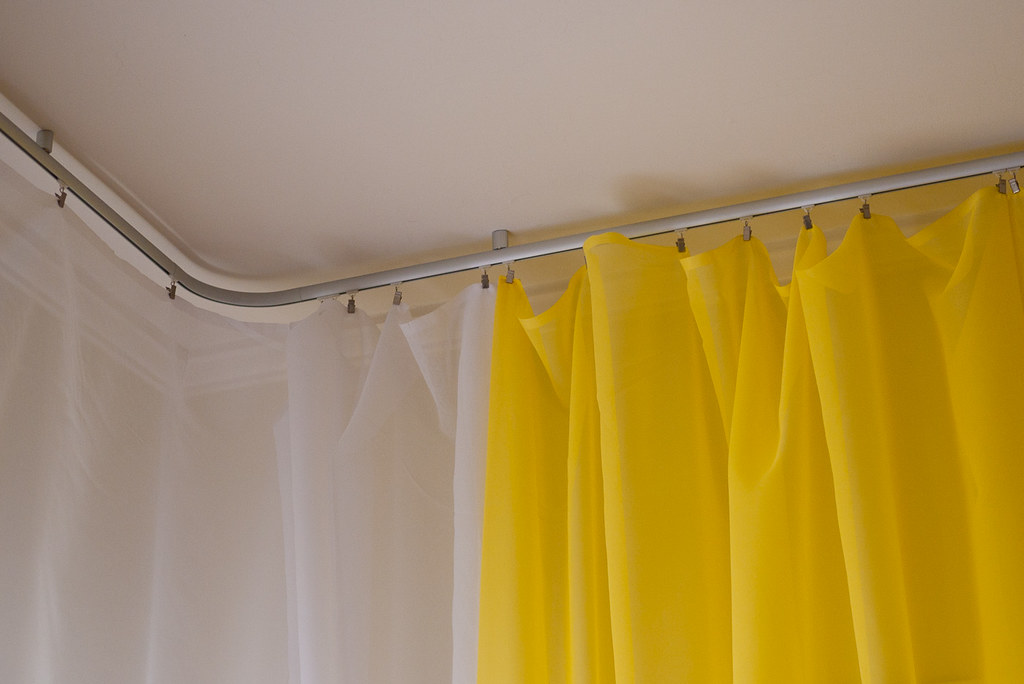
Before diving into the installation process, it’s crucial to understand what a corner window curtain track is and why it’s beneficial. Essentially, this type of track allows curtains to flow seamlessly around the corner of two windows meeting at a right angle. This setup is ideal for maintaining privacy and controlling light in unique architectural features like corner windows, which are common in modern homes.
The key advantage of using a track system for corner windows is its ability to create a continuous flow of fabric. Unlike separate curtain rods, a track connects the windows with a smooth curve, avoiding awkward gaps where light might sneak through.
Choosing the Right Track
Selecting the right curtain track involves considering both functionality and style. Tracks come in various materials, including plastic, metal, and even flexible options that can be bent to fit any angle. Metal tracks, particularly aluminum, are popular due to their durability and sleek look.
When picking a track, ensure it supports the weight of the curtains you plan to hang. Heavier drapes might require a sturdier track, whereas lighter materials can work with more basic models.
Preparing for Installation
Installation starts with accurate measurements. I measure the length of each window side where the track will be mounted and then add a few inches where the track will curve around the corner. This ensures the curtains will move smoothly without stretching or bunching up at the bend.
Next, gather all necessary tools and materials. Typically, you’ll need:
- A measuring tape
- A pencil for marking
- Screws and anchors suited to your wall type
- A drill
- A screwdriver
- The curtain track kit, which should include all mounting hardware
Installing the Track
- Marking the Drill Points: Using the pencil, mark the points where you’ll attach the track brackets on the wall. It’s essential to keep these points level to ensure that the track hangs straight.
- Drilling and Anchoring: Drill holes at the marked points, and then insert wall anchors. These anchors will help secure the screws and ensure that the track stays firmly in place, especially under the weight of the curtains.
- Attaching the Brackets: Screw the brackets into the anchored holes. Double-check that each bracket is tight and level before moving on to the next one.
- Installing the Track: Once all brackets are in place, it’s time to attach the track. If you’re using a flexible track, gently curve it to fit the corner. Secure the track onto the brackets according to the manufacturer’s instructions.
- Adding the Curtains: Finally, thread your curtains onto the track. Depending on the type of track system, you might use clips, hooks, or sliders.
Testing and Adjustments
After installation, test the curtains by pulling them back and forth across the track. This is when you’ll notice if there are any snags or if adjustments are needed. Occasionally, the track might need a bit more securing or the curtains might require different hooks to move smoothly.
Final Thoughts
Installing a corner window curtain track is an effective way to enhance the functionality and style of your living space. Not only does it solve the light and privacy issues unique to corner windows, but it also adds a seamless, elegant touch to the room’s decor. By following these steps, you can achieve a professional-looking installation that not only looks great but also performs beautifully day in and day out. Remember, the key is precision in measurement and installation—take your time to get it right, and you’ll be pleased with the functionality and aesthetic enhancement it brings to your space.