Where to Begin with Room Soundproofing: Essential Tips for Every Homeowner
Peace and quiet are luxuries that are increasingly hard to come by in a world filled with bustling streets, noisy neighbours, and the sounds of everyday life. If you’re a new homeowner, a dedicated DIY enthusiast, or a seasoned apartment dweller, the idea of creating your own oasis of calm by soundproofing your rooms can be very appealing. But, it can also seem like a daunting task, especially if you’re new to the world of soundproofing. Where do you even begin?
Assessing the Need for Soundproofing in Your Home
It’s essential to assess your current soundproofing status before you start any DIY soundproofing project within your home or apartment.
Understanding the layout and what type of noise you wish to mitigate will guide you toward the most efficient room soundproofing solutions. This step-by-step process goes beyond identifying the noisy areas but also highlights potential noise sources that may not be immediately apparent.
Identify Problematic Areas
Walk through your home during different times of the day and under varied conditions, such as when the dishwasher is running or when there is traffic outside. Take note of any areas where noise seems to come in significantly. Common culprits are windows, doors, and any adjacent walls where sound seems to travel freely.
Consider the Type of Noise
Is the noise a rumble from outside traffic, or is it the clatter of your neighbor’s nightly dishes through the wall? Learning the type of noise is crucial since different sounds require different methods for blocking. For example, low-frequency noises (e.g., bass music) often require denser materials to absorb them properly.
Potential Sources of Noise
When determining potential sound sources, it’s not just immediate neighbors you need to consider. Appliances, plumbing, and electrical systems within your home can create vibrations that travel through walls and floors. If you live in an apartment, think about shared walls and ceiling/floor structures that pass sound from other units through.
Different Types of Noise and Their Sources
Before you begin any soundproofing project, you should understand the basics of sound. Sound travels in waves, and these waves can be airborne noise, such as speech and music, or structure-borne noise, like vibrations from machinery or music. Here are the primary types of noise that will be important to consider:
- Airborne Noise
Most common in homes and apartments, airborne noise is any sound that travels through the air and is typically blocked by using sound absorption materials like fibreglass, foam, or mineral wool.
- Impact Noise
This is transmitted through the vibration of a structure, such as footsteps, closing a door, or tapping on the floor. Mass and decoupling are the key strategies to block impact noises.
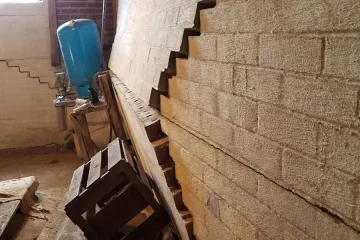
- Flanking Noise
Flanking noise occurs when sound bypasses through an indirect pathway. This could be through gaps in the room or materials not adequately soundproofed. Several home structure factors can contribute to flanking noise, such as wall studs and ceiling joists extending from one room to another, uninsulated floors, and air ducts.
Essential Tips for Soundproofing Walls, Floors, and Ceilings
When creating a true soundproof environment, the goal is to complete the “box-in-box” strategy, where every surface is decoupled and independently absorbent or reflective of sound. Here are some essential tips for soundproofing each of these key areas in your home:
- Soundproofing Walls
The most effective way to soundproof a wall is to increase its mass. You can achieve this by adding additional layers of drywall and green glue for damping or by filling the cavity with acoustic insulation, which breaks up sound waves. Additionally, using resilient channels can also help decouple sound.
- Soundproofing Floors
For floor soundproofing, adding a dense underlayment like rubber or cork to the subfloor before installing a flooring material can reduce impact noise. Carpeting with a pad also acts as a sound absorber. If you have access to the floor from below, you can also install acoustic batt insulation between the joists.
- Soundproofing Ceilings
The best bet for ceiling soundproofing is to control and dampen the impact noise by floating a secondary ceiling with resilient channels, filling the gap with dense acoustic insulation, and having a few inches of air space between the original ceiling and the new one.
Choosing the Right Materials for Your Soundproofing Project
Selecting the right materials is a critical step toward a successful soundproofing project. Considering both the type of noise you’re dealing with and the practicality of installation, the materials will vary. Here are some commonly used materials for soundproofing:
- Mass-Loaded Vinyl (MLV)
This is a dense, flexible material that is used to add mass to walls, floors, and ceilings without the need for a total rebuild. It’s especially effective for blocking airborne noise and can be used in layers with other soundproofing materials.
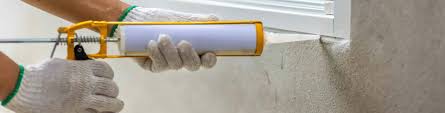
- Acoustic Sealant
Acoustic sealants are flexible, low-odour compounds designed to fill the gaps you find in rooms. They provide airtight, watertight seals and are vital for ensuring the soundproofing is effective.
- Acoustic Panel
Unlike standard insulation, acoustic panel is designed to absorb and reduce sound transmission. It is often thicker and denser than the typical insulating materials used for temperature control.
Step-by-Step Guide for a Basic Soundproofing Project
If you’re ready to get started with a simple soundproofing project, here’s a step-by-step guide to help you on your way.
Step 1: Prepare the Space
Before you begin soundproofing, clear the area and cover any furniture you can’t move. Emptying the room as much as possible will make the project easier to tackle.
Step 2: Seal and Fill Cracks
Use acoustic sealant to close any gaps, cracks, or holes. Remember that sound can travel through even the smallest openings, so thorough sealing is essential.
Step 3: Apply Resilient Channel
If you’re able to strip the walls back to the studs, install resilient channels before adding your new wall surface. These channels help absorb and scatter sound waves rather than conduct them through your home’s structure.
Step 4: Add Absorptive Materials
In new construction or sufficient space renovation, you can add absorptive materials like acoustic foam or fibreglass panels, which turn sound energy into heat energy.
Step 5: Increase Mass Without Hampering Structural Integrity
Adding mass to the structure is one of the most direct ways to reduce sound transmission. This can be layers of drywall, which provide extra density to the system. Ensure any new mass is well-supported and won’t cause any structural issues.
Achieving Professional Results in Your DIY Soundproofing Project
To elevate your soundproofing from good to great, there are several tips and tricks you can employ that professionals use to ensure the most effective results.
- Be Vigilant with Every Detail
Soundproofing is as much about the small details as it is about the big fixes. Check and double-check that every potential sound entry point is addressed, from light fixtures to electrical outlets to air ducts.
- Conduct Before-and-After Sound Tests
Measure the room’s sound profile before you begin the project, and take another set of measurements when you believe you’ve finished. This can help you understand which changes made the most significant impact and if there are any trouble spots you’ve missed.
- Consider Drastic Changes if Needed
Sometimes, the structure of your home simply can’t support the level of soundproofing you need with simple fixes. If the noise issue is substantial, you might need to consider more major renovations, such as room-in-room construction or adding a floating floor.
Conclusion
Soundproofing your home is an investment in your peace of mind and general well-being. Implementing these tips will guide you toward creating a living space that is shielded from the outside world. It’s important to remember that while effective, soundproofing is not a one-size-fits-all solution, and some adjustments may be necessary as you fine-tune the acoustics of your home.
Don’t forget to share your soundproofing successes and tips with the community. We all deserve to live in a home that feels like a sanctuary, a place where the noise of the world can be turned down, and our lives can be enjoyed with a little extra serenity. Keep the knowledge flowing, and the soundproof barriers growing.